Getting started
Before plugging the Development Kit in for the first time, it’s worth familiarizing yourself with both: the ports on the back of the device as well as the First boot procedure.
Connectors
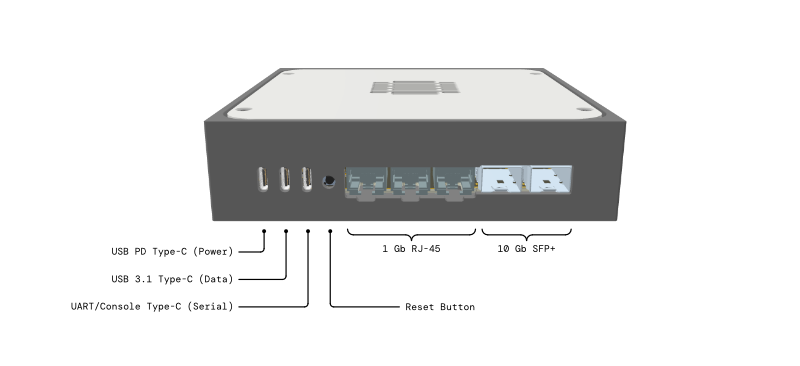
More detailed information about the ports is provided in Hardware description
| Port (left to right) | Name |
|---|---|
| 0 | USB-C power |
| 1 | USB-C |
| 2 | USB-C UART |
| 3 | eth1 (1 Gb RJ-45) |
| 4 | eth2 (1 Gb RJ-45) |
| 5 | eth0 (1 Gb RJ-45) |
| 6 | eth3 (10 Gb SFP+) |
| 7 | eth4 (10 Gb SFP+) |
First boot
-
Connect the power cable and the UART cable to your computer. ( Power is left most, UART is right most. )
-
Open a serial terminal:
tio /dev/ttyUSB0(Adjust the device path if needed—check
ls /dev/ttyUSB*to find yours.) -
You should now see output from the device.
Press the reset button to observe the full boot sequence. The device will boot through U-Boot, which displays a countdown before loading the OS. You can either:
- Let it continue — boots into OpenWrt on the eMMC.
- Press any key — interrupts the countdown and drops you into the U-Boot shell.
When attaching the USB cable to the router’s UART, in dmesg you will see something like:
[  292.530676] usb 7-2: new full-speed USB device number 2 using xhci_hcd
[  292.682522] usb 7-2: New USB device found, idVendor=0403, idProduct=6015, bcdDevice=10.00
[  292.682529] usb 7-2: New USB device strings: Mfr=1, Product=2, SerialNumber=3
[  292.682532] usb 7-2: Product: FT230X Basic UART
[  292.682534] usb 7-2: Manufacturer: FTDI
[  292.682536] usb 7-2: SerialNumber: DK0JTX4I
[  292.710533] usbcore: registered new interface driver ftdi_sio
[  292.710557] usbserial: USB Serial support registered for FTDI USB Serial Device
[  292.710742] ftdi_sio 7-2:1.0: FTDI USB Serial Device converter detected
[  292.710783] usb 7-2: Detected FT-X
[  292.720684] usb 7-2: FTDI USB Serial Device converter now attached to ttyUSB0
Recovery Linux
To explore the firmware or troubleshoot issues, enter the following in U-Boot:
=> run recoveryThis boots a minimal Linux environment from the firmware region of the selected boot medium. While its primary purpose is recovering a broken main OS, it’s also useful for low-level system maintenance and learning how the components work.
The default user is root with no password.
To exit Recovery Linux and boot into OpenWrt:
$ rebootIf OpenWrt ever fails to boot — or you want to re-flash it from scratch — recovery Linux is where you do it; see Installing OpenWrt.
Status LED
During boot, U-Boot runs a series of hardware tests to verify that all I2C devices are present and functioning correctly. This includes power sensors, thermal sensors, the fan controller, power delivery controller, EEPROM, and more.
| LED Color | Meaning |
|---|---|
| Green (solid) | All hardware tests passed |
| Red (solid) | One or more tests failed |
| Orange (pulsing) | Booted into Recovery Linux |
| White (solid) | Booted into OpenWrt |
If the LED turns red, reset the device and check the U-Boot output via the serial console—it will report which chip failed its test.
Reading serial number and MAC addresses from EEPROM
From U-Boot
=> i2c dev 3
Setting bus to 3
=> i2c md 0x50 0.2 100
0000: 4d 41 47 43 00 01 a6 3f 4d 6f 6e 6f 20 47 61 74    MAGC...?Mono Gat
0010: 65 77 61 79 20 44 65 76 65 6c 6f 70 6d 65 6e 74    eway Development
0020: 20 4b 69 74 00 00 00 00 4d 54 2d 52 30 31 41 2d     Kit....MT-R01A-
0030: 30 33 32 36 2d 30 30 34 30 34 00 00 00 00 00 00    0326-00404......
0040: 00 00 00 00 00 00 00 00 00 00 00 00 00 00 00 00    ................
0050: 00 00 00 00 00 00 00 00 00 00 00 00 00 00 00 00    ................
0060: 00 00 00 00 00 00 00 00 e8 f6 d7 00 17 df e8 f6    ................
0070: d7 00 17 e0 e8 f6 d7 00 17 e1 e8 f6 d7 00 17 e2    ................
0080: e8 f6 d7 00 17 e3 ff ff ff ff ff ff ff ff ff ff    ................
0090: ff ff ff ff ff ff ff ff ff ff ff ff ff ff ff ff    ................
From recovery linux
root@recovery:~# echo 24c32 0x50 > /sys/bus/i2c/devices/i2c-3/new_device
root@recovery:~# hexdump -C /sys/bus/i2c/devices/3-0050/eeprom
00000000  4d 41 47 43 00 01 a6 3f  4d 6f 6e 6f 20 47 61 74  |MAGC...?Mono Gat|
00000010  65 77 61 79 20 44 65 76  65 6c 6f 70 6d 65 6e 74  |eway Development|
00000020  20 4b 69 74 00 00 00 00  4d 54 2d 52 30 31 41 2d  | Kit....MT-R01A-|
00000030  30 33 32 36 2d 30 30 34  30 34 00 00 00 00 00 00  |0326-00404......|
00000040  00 00 00 00 00 00 00 00  00 00 00 00 00 00 00 00  |................|
*
00000060  00 00 00 00 00 00 00 00  e8 f6 d7 00 17 df e8 f6  |................|
00000070  d7 00 17 e0 e8 f6 d7 00  17 e1 e8 f6 d7 00 17 e2  |................|
00000080  e8 f6 d7 00 17 e3 ff ff  ff ff ff ff ff ff ff ff  |................|
00000090  ff ff ff ff ff ff ff ff  ff ff ff ff ff ff ff ff  |................|
*
00001000
root@recovery:~# echo 0x50 > /sys/bus/i2c/devices/i2c-3/delete_device
With Python
In case you have installed an operating system that comes with Python 3 or installed Python 3 manually:
sudo python3 - <<"EOF"
import os, fcntl
fd = os.open("/dev/i2c-3", os.O_RDWR)
fcntl.ioctl(fd, 0x0706, 0x50)
os.write(fd, bytes([0x00, 0x0]))
print(os.read(fd, 160))
EOF
And if you want just serial number:
sudo python3 - <<"EOF"
import os, fcntl
fd = os.open("/dev/i2c-3", os.O_RDWR)
fcntl.ioctl(fd, 0x0706, 0x50)
os.write(fd, bytes([0x00, 0x28]))
print(os.read(fd, 64).split(b"\x00")[0].decode())
EOF
Next steps
Using OpenWrt (default)
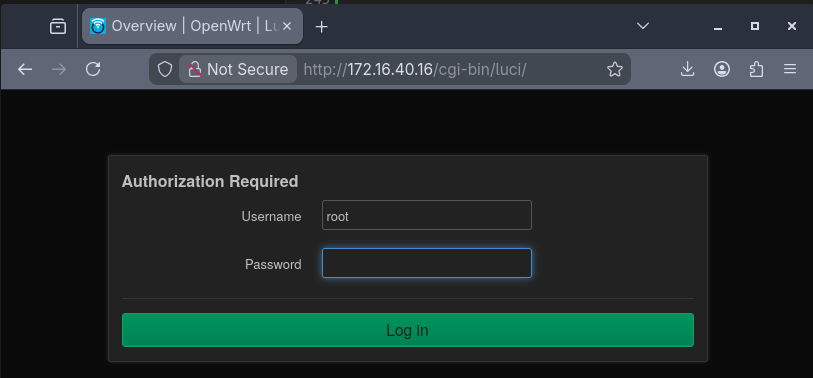
The Development Kit ships with OpenWrt pre-installed — LuCI (the web interface) and all the standard OpenWrt package feeds are already there. To start using it, connect a client to one of the RJ-45 ports and open https://192.168.1.1 in your browser (accept the self-signed-certificate warning), then configure the device in LuCI.
To install extra packages, update the feed index and add what you need:
apk update
apk add <package>
Updating the whole system is handled by Attended Sysupgrade — see Installing OpenWrt → Updating.
Installing an alternative OS
If you’d prefer to run Debian or Mono SDK Linux instead, see Alternative operating systems. This is coming soon.